Streamlabs download is the fastest way to start streaming like a pro—even if you’re a complete beginner. In this guide, you’ll learn how to download and set up Streamlabs, optimize your settings for YouTube, and discover powerful features that can help you grow and earn from your streams.
How to Download Streamlabs Desktop (Step-by-Step Guide)
Downloading Streamlabs is quick and beginner-friendly. In this section, you’ll learn the exact steps for a safe and smooth streamlabs download, even if it’s your first time.
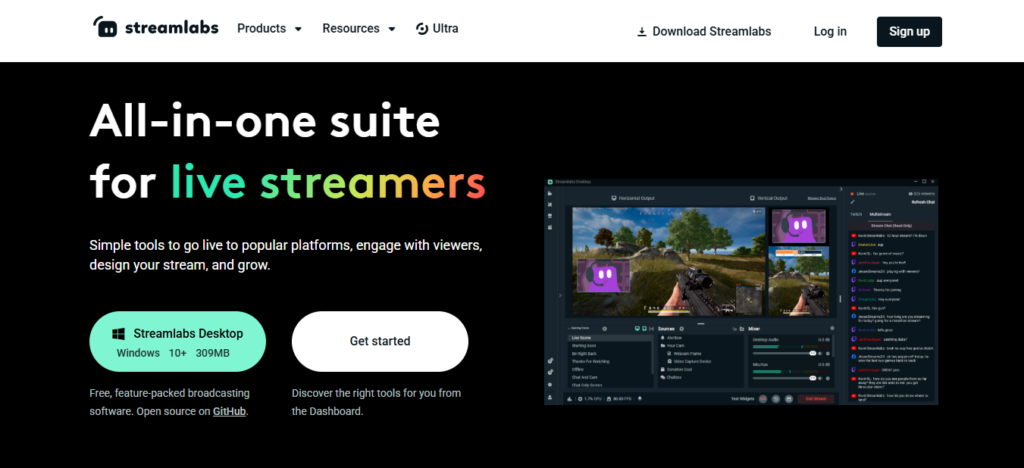
Where to Download Streamlabs Safely
Before you start, make sure you download Streamlabs from the official website only.
Why this matters:
- Avoid viruses or fake software
- Get the latest version
- Access full features and updates
Download Streamlabs Desktop Free (Step-by-Step)
Follow these simple steps to download streamlabs desktop free:
- Go to the official Streamlabs website
- Click the “Download” button
- Choose your device (Windows or Mac)
- The file will start downloading automatically
✔ File size is usually small, so it downloads fast
Installing Streamlabs on Windows and Mac
Once your download is complete, follow these steps:
For Windows:
- Open the downloaded
.exefile - Click Install
- Wait for the installation to finish
- Launch Streamlabs
For Mac:
- Open the
.dmgfile - Drag Streamlabs into the Applications folder
- Open the app
First-Time Setup After Installation
After installation, you’ll need to log in and connect your account.
Steps:
- Open Streamlabs Desktop
- Log in using YouTube, Twitch, or Facebook
- Allow permissions
- Import settings (optional)
This connects your account to the streamlabs dashboard setup, where you manage alerts, donations, and more.
Quick Tips for a Smooth Setup
- Use a stable internet connection
- Close other heavy apps during install
- Keep your system updated
- Log in with the platform you plan to stream on
What to Do Next
Now that your streamlabs download is complete, the next step is setting up your stream.
👉 This is where most beginners stop—but to stream like a pro, you’ll need:
- Proper settings
- Alerts and overlays
- Performance optimization
Streamlabs Dashboard Setup for Beginners
After completing your streamlabs download, the next step is setting up your dashboard. This is where you control alerts, donations, overlays, and your entire stream experience.
Don’t worry—this guide keeps it simple and beginner-friendly.
Create and Log Into Your Streamlabs Account
To start your streamlabs dashboard setup, you need to log in.
Steps:
- Open Streamlabs Desktop
- Click Log In
- Choose your platform:
- YouTube
- Twitch
- Allow all permissions
✔ This connects your streaming account automatically
Understanding the Streamlabs Dashboard
Once logged in, you’ll see your dashboard. This is your control center.
Main sections to know:
- Editor → Build your stream layout
- Alerts Box → Manage notifications (followers, donations)
- Themes → Choose stream designs
- Cloudbot → Automate chat (commands, moderation)
Take a few minutes to explore—this makes everything easier later.
Setting Up Alerts (Very Important)
Alerts make your stream interactive. They show when someone:
- Subscribes
- Donates
- Follows
How to set alerts:
- Go to Alerts Box
- Choose alert type (donation, subscriber, etc.)
- Customize:
- Text
- Sound
- Animation
- Click Save Settings
✔ This keeps viewers engaged and encourages more interaction
Setting Up Donations
If you want to earn money, this step is key.
Steps:
- Go to Dashboard → Settings → Donations
- Connect a payment method (PayPal, etc.)
- Add a donation link to your stream
✔ Now viewers can support you easily
Adding Widgets to Your Stream
Widgets improve your stream quality.
Popular widgets:
- Alert Box
- Chat Box
- Event List
- Donation Goal
How to add widgets:
- Go to Editor
- Click Add Source
- Select a widget
- Resize and position it
Choosing a Theme or Overlay
Your stream should look professional.
Steps:
- Go to Themes
- Browse free and premium designs
- Apply your favorite theme
✔ This instantly improves your stream look
This is where many users upgrade.
Quick Tips for Beginners
- Start with simple layouts
- Don’t overload your screen with widgets
- Test alerts before going live
- Keep your branding consistent
What to Do Next
Your streamlabs dashboard setup is now complete 🎉
Next, you should:
- Optimize your stream quality
- Adjust bitrate and resolution
- Improve audio and video settings
Best Streamlabs OBS Settings for YouTube Streaming
After completing your streamlabs download and dashboard setup, the next step is optimizing your settings. The right setup will give you clear video, smooth streaming, and no lag.
This guide covers the best streamlabs OBS settings for YouTube in a simple way.
Video Settings (Resolution & FPS)
These settings control how your stream looks.
Recommended settings:
- Base Resolution: 1920×1080 (Full HD)
- Output Resolution: 1280×720 (for smoother streaming)
- FPS (Frames Per Second):
- 30 FPS → good for beginners
- 60 FPS → smoother but needs better internet
✔ If your PC is slow, use 720p at 30 FPS
Bitrate Settings (Very Important)
Bitrate controls stream quality and stability.
Recommended YouTube bitrate:
- 720p (30 FPS): 2500–4000 kbps
- 720p (60 FPS): 3500–5000 kbps
- 1080p (60 FPS): 4500–9000 kbps
✔ Higher bitrate = better quality (but needs strong internet)
Encoder Settings (Performance Boost)
Encoder decides how your video is processed.
Options:
- x264 (CPU) → better quality, uses more CPU
- NVENC (GPU) → better performance, less lag
✔ Use NVENC if you have an NVIDIA graphics card
Audio Settings for Clear Sound
Bad audio can ruin your stream, even if video is good.
Best settings:
- Sample Rate: 44.1 kHz or 48 kHz
- Desktop Audio: Your speakers/headset
- Mic: Your main microphone
✔ Keep mic volume clear (not too loud or too low)
Output Settings (Advanced Setup)
Go to Settings → Output → Advanced Mode
Recommended setup:
- Rate Control: CBR (Constant Bitrate)
- Keyframe Interval: 2
- Preset: Quality or Performance
- Profile: High
✔ These settings match YouTube’s requirements
Internet Speed Requirements
Before going live, test your internet.
Minimum upload speed:
- 5 Mbps → basic streaming
- 10 Mbps+ → smooth HD streaming
✔ Use a wired connection for stability
Quick Performance Tips
- Close unused apps
- Lower resolution if lagging
- Update graphics drivers
- Use Game Mode (Windows)
Fix Common Streaming Issues
Lag or dropped frames?
- Lower bitrate
- Switch to 720p
Blurry stream?
- Increase bitrate
- Check output resolution
Audio not working?
- Re-select mic in settings
What to Do Next
Your streamlabs OBS settings for YouTube are now optimized ✅
Now you’re ready to:
- Go live with confidence
- Improve stream quality
- Grow your audience faster
👉 Next, learn about Streamlabs Prime benefits and whether upgrading is worth it.
Streamlabs Free vs Streamlabs Prime (Full Comparison)
After completing your streamlabs download, you might wonder:
Should you use the free version or upgrade to Prime?
This section breaks it down in a simple way so you can decide fast.
Quick Overview
- Streamlabs Free → Great for beginners
- Streamlabs Prime → Best for serious streamers who want more features
1. Pricing
- Free Version: $0 (no cost)
- Prime Version: Monthly or yearly subscription
✔ Start free, upgrade later if needed
2. Features
Free:
- Basic streaming tools
- Limited overlays
- Standard alerts
Prime:
- Advanced tools
- Premium apps
- More customization
3. Overlays & Themes
Free:
- Limited designs
- Basic layouts
Prime:
- Hundreds of premium overlays
- Professional stream designs
✔ Makes your stream look high-quality instantly
4. Multistreaming
Free:
- Stream to one platform only
Prime:
- Stream to multiple platforms at once (YouTube, Twitch, etc.)
✔ Great for growing faster
5. Cloud Backup
Free:
- No cloud storage
Prime:
- Save your settings online
- Access from any device
6. App Store Access
Free:
- Limited apps
Prime:
- Full access to premium apps and tools
7. Custom Branding
Free:
- Basic branding
Prime:
- Custom logos, themes, and layouts
✔ Helps you stand out
8. Donation Tools
Free:
- Basic donation setup
Prime:
- Advanced donation pages
- More customization
✔ Better for monetization
9. Mobile Streaming
Free:
- Limited mobile features
Prime:
- Enhanced mobile streaming tools
10. Ease of Use
Free:
- Simple and beginner-friendly
Prime:
- More features but still easy to use
11. Performance
Free:
- Good performance
Prime:
- Optimized tools for better workflow
12. Support & Updates
Free:
- Basic support
Prime:
- Priority support
- Early access to new features
Key Streamlabs Prime Benefits
Here are the main streamlabs download prime benefits:
- Premium overlays and themes
- Multistreaming capability
- Advanced donation tools
- Cloud backup
- Access to exclusive apps
✔ Best for streamers who want to grow faster
Who Should Use Free vs Prime?
Choose Free if you:
- Are just starting out
- Want to test streaming
- Have a limited budget
Choose Prime if you:
- Want professional-looking streams
- Plan to grow your channel
- Want to earn money from streaming
Final Verdict
After your streamlabs download, the free version is enough to get started.
But if you want:
- Better design
- More tools
- Faster growth
👉 Then upgrading is worth it.

Key Streamlabs Prime Benefits (Is It Worth It?)
After completing your streamlabs download, you can stream for free.
But if you want more features, better design, and faster growth, you may consider upgrading.
Let’s break down the main streamlabs prime benefits in a simple way.
What Is Streamlabs Prime?
Streamlabs Prime is a paid upgrade that unlocks extra tools inside Streamlabs Desktop.
✔ You don’t need to download anything new
✔ It works with your existing setup
1. Premium Overlays & Themes
One of the biggest upgrades is design.
With Prime, you get:
- Hundreds of professional overlays
- Animated alerts
- Unique stream layouts
✔ This makes your stream look clean and professional instantly
2. Multistreaming (Grow Faster)
This is one of the most powerful features.
What it does:
- Stream to YouTube, Twitch, Facebook at the same time
✔ More platforms = more viewers and faster growth
3. Access to All Apps (More Tools)
Streamlabs download has an app store with useful tools.
With Prime, you unlock:
- All apps in the Streamlabs App Store
- Music tools, alert apps, automation tools
✔ Helps you improve your stream easily
4. Custom Website & Branding
You can build your own streaming website.
Features include:
- Custom domain
- Personal website
- Social media integration
✔ Helps you build a strong brand online
5. Merch Store (Earn Money)
Want to sell your own merch?
Prime allows you to:
- Create custom products (hoodies, shirts, etc.)
- Sell directly to your audience
✔ Streamlabs download handles payment, printing, and shipping
6. Advanced Cloudbot Customization
Cloudbot helps manage your chat.
With Prime, you can:
- Customize commands
- Automate chat responses
- Improve moderation
✔ Makes your stream more professional
7. Mobile Streaming & Cloud Features
You can stream on the go.
Benefits:
- Stream from your phone
- Cloud backup for settings
- No data loss
✔ Great for IRL (real-life) streamers
8. More Monetization Opportunities
With Prime, you get more ways to earn:
- Better donation pages
- Merch store
- Multiple platform income
✔ Helps you turn streaming into a business
Pros and Cons (Simple Breakdown)
✅ Pros
- Professional overlays
- Multistreaming
- More tools and apps
- Better monetization
❌ Cons
- Monthly cost
- Not required for beginners
Is Streamlabs Prime Worth It?
✔ YES, if you:
- Want to grow faster
- Care about stream quality
- Plan to make money
❌ NO, if you:
- Are just testing streaming
- Don’t need advanced features
Streamlabs Alternatives (Quick Comparison)
After completing your streamlabs download, you might wonder:
Are there better tools out there?
The truth is, Streamlabs download is great—but it’s not the only option.
Let’s look at the best alternatives and how they compare.
Why Consider Streamlabs Alternatives?
You may want an alternative if you:
- Need better performance
- Want more control over settings
- Prefer free tools with no paid upgrades
- Don’t need streamlabs prime benefits
Top Streamlabs Alternatives
1. OBS Studio (Best Free Alternative)
Overview:
OBS Studio is the most popular streaming software.
Pros:
- 100% free and open-source
- Very powerful and customizable
- No paid upgrades
Cons:
- Harder to set up than Streamlabs
- No built-in themes or alerts
✔ Best for advanced users
2. StreamElements (Best for Cloud Streaming)
Overview:
StreamElements works with OBS and runs mostly in the cloud.
Pros:
- Free overlays and themes
- Cloud-based tools (less CPU usage)
- Good for beginners
Cons:
- Requires OBS setup
- Fewer built-in features than Streamlabs
3. XSplit (Best for Ease of Use)
Overview:
XSplit is a simple and user-friendly streaming tool.
Pros:
- Easy to use
- Clean interface
- Good support
Cons:
- Paid features
- Limited free version
4. Twitch Studio (Best for Beginners on Twitch)
Overview:
Made by Twitch for new streamers.
Pros:
- Very easy setup
- Built for beginners
- Simple interface
Cons:
- Only works with Twitch
- Limited features
Quick Comparison Table
| Feature | Streamlabs | OBS Studio | StreamElements | XSplit | Twitch Studio |
|---|---|---|---|---|---|
| Ease of Use | ⭐⭐⭐⭐ | ⭐⭐ | ⭐⭐⭐ | ⭐⭐⭐⭐ | ⭐⭐⭐⭐⭐ |
| Customization | ⭐⭐⭐⭐ | ⭐⭐⭐⭐⭐ | ⭐⭐⭐⭐ | ⭐⭐⭐ | ⭐⭐ |
| Free Version | Yes | Yes | Yes | Limited | Yes |
| Built-in Alerts | Yes | No | Yes | Yes | Yes |
| Multistreaming | Paid | Manual | Yes | Paid | No |
Streamlabs vs Alternatives: Key Differences
Ease of Setup
- Streamlabs → easiest after streamlabs download
- OBS → more complex
Features
- Streamlabs → all-in-one tool
- OBS → requires plugins
Performance
- OBS → better performance
- Streamlabs → slightly heavier
Monetization
- Streamlabs → built-in tools + Prime
- Others → require integrations
Which One Should You Choose?
✅ Choose Streamlabs download if you:
- Want an easy setup
- Like built-in tools
- Plan to use streamlabs download dashboard setup and overlays
✅ Choose OBS Studio if you:
- Want full control
- Prefer a free solution
✅ Choose StreamElements if you:
- Want cloud-based tools
- Like free overlays
Final Thoughts
While there are many alternatives, Streamlabs download remains one of the best choices for beginners and growing streamers.
✔ Easy setup
✔ Built-in features
✔ Upgrade options for growth
🚀 Next Step
If you haven’t started yet:
👉 Complete your streamlabs download and begin streaming today
Or explore more:
- Best settings for YouTube
- Streamlabs Prime benefits
- Troubleshooting common issues
Final Verdict: Is Streamlabs Download Worth It in 2026?
So, after everything we’ve covered, is streamlabs download actually worth it in 2026?
👉 Short answer: Yes — for most beginners and growing streamers.
But it depends on your needs.
✅ Why Streamlabs Is Worth It
1. Easy Setup (Best for Beginners)
Streamlabs download is one of the easiest tools to use.
- You can go live in minutes
- Built-in alerts, overlays, and widgets
- Simple dashboard
✔ Many users say it’s ideal for beginners because of its ease of use
2. All-in-One Streaming Tool
Unlike other tools, Streamlabs download combines everything:
- Streaming
- Alerts
- Donations
- Basic editing
✔ You don’t need multiple apps
3. Free Version Is Powerful
After your streamlabs download, you can stream without paying.
- Go live on YouTube or Twitch
- Use basic overlays
- Set up alerts and donations
✔ The free plan covers most beginner needs
4. Great for Growing Streamers
If you upgrade, you unlock:
- Multistreaming
- Premium overlays
- Advanced monetization tools
✔ These features help you grow faster and earn more
❌ When Streamlabs Is NOT Worth It
1. If You Have a Low-End PC
Streamlabs download can use more system resources.
- May cause lag on older computers
- Heavier than OBS Studio
✔ Performance issues are a common downside
2. If You Want Full Control
Advanced users may prefer OBS Studio.
- More customization
- More plugins
- Better performance
3. If You Don’t Want Paid Features
Some advanced tools are locked behind Prime.
✔ Many users mention paywalled features as a drawback
⚖️ Final Decision (Simple Breakdown)
👉 Choose Streamlabs if you:
- Are a beginner
- Want quick setup
- Prefer an all-in-one tool
- Plan to grow your channel
👉 Choose Alternatives if you:
- Have a low-end PC
- Want advanced customization
- Prefer fully free tools
🚀 Final Verdict
In 2026, streamlabs download is absolutely worth it—especially if you are just starting out.
✔ Easy to use
✔ Free to start
✔ Powerful upgrade options
👉 The best approach:
- Start with the free version
- Upgrade only when you need more features
Final Thought
You don’t need expensive tools to start streaming.
But with the right setup, you can grow faster.
👉 And that starts with a simple streamlabs download.
Want to create high-quality content faster? Check out our guide on LockedIn AI to boost your streaming and blogging strategy.